|
|
Devices << ArduinoDevice << ArduinoDevices << SeeedDevices | Software Overview | Sitemap | Downloads | Developers | Forums |
|
|
Devices << ArduinoDevice << ArduinoDevices << SeeedDevices | Software Overview | Sitemap | Downloads | Developers | Forums |
|
|
Configuring Seeed Devices on the Arduino DeviceHere we describe the Seeed devices we support. If you have a need for Seeed device which is not in this list, you may be able to support it using standard pin configurations. To learn more about Seeed and their devices, see the http://www.seeedstudio.com website. The Seeed devices use a simple interface called Grove. The Grove interface is physically just a small connector with 4 pins. Two of pins are for power and ground, and the other two go to signals on an Arduino. Seeed has developed many boards using the Grove interface, and the boards are generally inexpensive. The Grove interface provides a robust and simple way to interface many devices to your Arduino. The Seeed devices we support are: Barometer Sensor (BMP180) The devices are added to an Arduino by running a Script. The Grove Scripts are all in the Arduino/Devices Scripts directory in the Seeed subdirectory. Many devices (switches, relays, LEDs) require only the standard pin configurations found in the PinTypes subdirectory (see General Purpose Pin Configuration) and need no special Scripts. Other devices may not be suitable for adding to a Firmata based system (though you can add them, if you are willing to do some Arduino coding). Configuring a BMP180 Barometer Sensor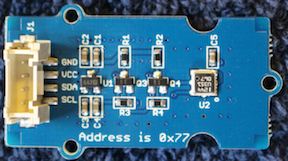
The Seeed Studio BMP180 Barometer Sensor is a Grove device with an I2C interface. It senses temperature and atmospheric pressure. Temperature is measured in Fahrenheit and Celsius, and pressure in hPa. To add a BMP180 Barometer Sensor to an Arduino, run the BarometerSensorBMP180 Script. The Script adds a trigger input terminal and output terminals for temperature and pressure to an Arduino Device. The trigger terminal tells the Arduino to sample the sensor. As is the case for all Arduino Devices Scripts, the terminal names are user definable. The BarometerSensorBMP180 Script has the following input parameters:
If you want to leave a temperature or pressure terminal off of your Arduino, define its name as the empty string (""). Here's an example using the BarometerSensorBMP180 Script. The sensor is plugged into an Arduino with ID "arduino". The Arduino has a Celsius terminal named "tempC", a pressure terminal named "pressure", and a trigger terminal named "trigger".
Configuring a High Accuracy Barometer Sensor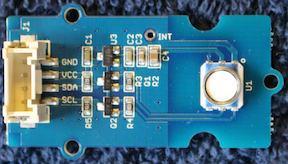
The Seeed Studio High Accuracy Barometer Sensor is a Grove device with an I2C interface. It senses temperature, atmospheric pressure, and height (as a function of pressure). Temperature is measured in Fahrenheit and Celsius, pressure in hPa, and height in meters. To add a High Accuracy Barometer Sensor to an Arduino, run the BarometerSensorHiAcc Script. The Script adds a trigger input terminal and output terminals for temperature, pressure and height to an Arduino Device. The trigger terminal tells the Arduino to sample the sensor. As is the case for all Arduino Devices Scripts, the terminal names are user definable. The BarometerSensorHiAcc Script has the following input parameters:
If you want to leave a temperature, pressure, or height terminal off of your Arduino, define its name as the empty string (""). Here's an example using the BarometerSensorHiAcc Script. The sensor is plugged into an Arduino with ID "arduino". The Arduino has a Celsius terminal named "tempC", a pressure terminal named "pressure", and a trigger terminal named "trigger".
Configuring a High Accuracy Temperature/Humidity Sensor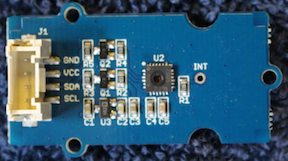
The Seeed Studio High Accuracy Temperature/Humidity Sensor is a Grove device with an I2C interface. It senses both temperature and relative humidity. To add a Temperature/Humidity Sensor to an Arduino, run the TempHumiditySensorHiAcc Script. The Script adds a trigger input terminal and output terminals for temperature and humidity to an Arduino Device. The trigger terminal tells the Arduino to sample the sensor. As is the case for all Arduino Devices Scripts, the terminal names are user definable. The TempHumiditySensorHiAcc Script has the following input parameters:
If you want to leave a temperature or humidity terminal off of your Arduino, define its name as the empty string (""). Here's an example using the TempHumiditySensorHiAcc Script. The sensor is plugged into an Arduino with ID "arduino". The Arduino has a Fahrenheit terminal named "tempF", a humidity terminal named "humidity", and a trigger terminal named "trigger".
Note: in theory, the I2C interface can be shared between this sensor and other I2C devices with different addresses. However, we've found that this device doesn't work well with other I2C devices, so we recommend using it alone on the I2C bus. Configuring the LCD with RGB Backlight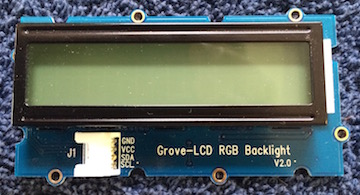
The Seeed Studio RGB Backlight is an I2C device with an alphanumeric 2 line LCD display and a backlight. When used in a Virtual Wiring system, the LCD (liquid crystal display) can display any value in the Virtual Wiring system, while its RGB (red, green, blue) backlight can light up in most any color. To add an LCD RGB Backlight device to an Arduino, wire the device to a previously installed Arduino's I2C signals (a single Grove cable will do the trick) and run the LCDRGBBacklight Script. The Script adds "message", "red", "green", and "blue" terminals to the Arduino Device (these are for displaying messages and for controlling the red, green, and blue values of the backlight). As is the case for all Arduino Devices Scripts, the terminal names are user definable. The "message" terminal is an input, and it will send to the display whatever values it sees. Since the display has two lines, it will put the most recent value it sees on the bottom and scroll the 2nd most recent value to the top. The "red", "green", and "blue" terminals are also inputs, and they accept numeric and "on" or "off" values. "on" will turn the backlight color fully on, and "off" will turn the color off. A number value of 100 will also turn a color fully on, and a value of 0 will turn the color off. Numbers between 0 and 100 will vary the color's intensity. The RGB Backlight Device takes an optional "avoid_quotes" parameter for stripping quotes from strings sent to the "message" terminal. "avoid_quotes" is useful if one doesn't want to see quotes around string values sent to the Device. By default, the "avoid_quotes" parameter defaults to true, so if it is not supplied, it is the same as setting the parameter explicitly to true. When "avoid_quotes" is set to true, the Device will strip any double quoted strings of their quotes, and it will leave unquoted values unchanged. When "avoid_quotes" is set to false, the Device will display whatever is sent to it, as is. The "avoid_quotes" parameter was added to the Virtual Wiring software in version 1.13.0; it is not available in earlier versions. 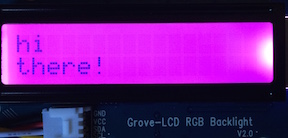
The LCDRGBBacklight Script has the following input parameters:
Here's an example using the LCDRGBBacklight Script. The sensor is plugged into an Arduino with ID "arduino". The Arduino has a message terminal named "msg", a red terminal named "red", a green terminal named "green", and a blue terminal named "blue". It will strip quotes from values sent to its message terminal before displaying them (note that since
Note: since the LCD RGB Backlight does not have a programmable I2C address, you can only configure one per Arduino. If you want a system to have more than 1 LCD RGB Backlight, you'll need to add an additional Ardiuno for each additional LCD RGB Backlight. Configuring a Temperature Sensor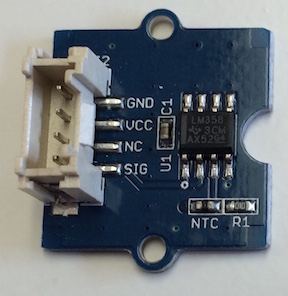
The Seeed Studio temperature sensor is a Grove device with an analog output representing a temperature value. The sensor is said to be accurate to better than a couple of degrees Fahrenheit or 1 degree Celsius. The formula for converting the output value of a temperature sensor to a temperature is published on the Seeed Wiki site. It is hard to remember and somewhat difficult to implement, so having a Script simplifies adding these temperature sensors. There are two temperature sensor Scripts for configuring a Seeed temperature sensor. One outputs temperature values in Fahrenheit and the other in Celsius. The Scripts are called TemperatureSensor_F and TemperatureSensor_C. They both require the following parameters:
To add a temperature sensor measuring in Celsius to analog input A4 on the Arduino with ID "arduino", here are parameter values for the TemperatureSensor_C Script:
Working with Later Version Temperature SensorsSeeed Studio has released later versions of these temperature sensors. They are similar to the originals in that they use a thermistor device for sensing temperature. However, if you run a temperature sensor Script on a temperature sensor with the wrong revision number, your temperatures will be inaccurate. At the time of this writing, we are aware of a version 1.1 temperature sensor. If you have a V1.1 temperature sensor, run the TemperatureSensor_F_V1.1 or TemperatureSensor_C_V1.1 Script instead. Configuring a Thumb Joystick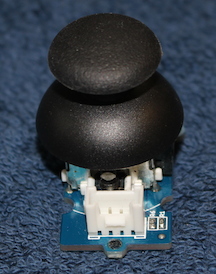
The Seeed Studio Thumb Joystick sensor is a Grove device with 2 analog outputs representing the horizontal and vertical positions of a joystick. As one moves the joystick, the voltage values on the 2 outputs change. The Script for adding a Thumb Joystick sensor is called ThumbJoystick. It requires the following parameters:
To add a Thumb Joystick with horizontal position wired to Arduino pin A1, vertical position wired to Arduino pin A0, with Arduino Device terminals named "horizontal" and "vertical", a percentage output, on an Arduino Device with ID "arduino", the parameter values for the ThumbJoystick Script are as follows:
|
Catalina Computing, LLC.Copyright © Catalina Computing, LLC. (2013-2018) 
|
Page last updated: Wed Sep 18 21:38:40 2019 (UTC) |