|
|
Tour << TourAddingDevices | Software Overview | Sitemap | Downloads | Developers | Forums |
|
|
Adding DevicesBuilding Virtual Wiring systems starts with adding devices. Devices are what make things happen. These can be lights, relays, robots, sensors, radios, WiFi platforms, cellphone applications, emailers, texters, timers, and many others. One adds devices by running a Script from Virtual Wiring's Scripts page. As an example, running the Interval Timer Script creates a timer Device which turns on or off anything within the Virtual Wiring system based on time of day, day of the week, or day of a month. When you run a Script, it will ask you for some parameters. At the very least, it will ask you what you want to call the Device, so you can recognize it within the system (Device Scripts all require a name or "id" parameter). For something like a timer, it will also ask you for the timer's settings parameters (when it should turn on and off). 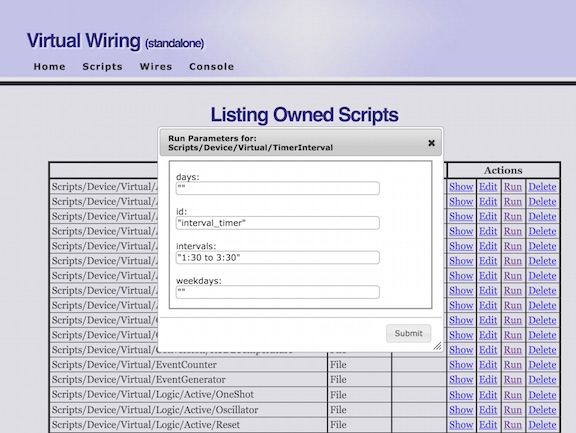
You've probably noticed that when we talk about devices within the Virtual Wiring system, we refer to them as Devices (with a capital D). We make this distinction because the actual, real device and how it appears within the Virtual Wiring system are different. True, they mirror one another, but Virtual Wiring's representation of a timer and a physical timer are not the same thing (though in most cases, you can think of the two timers as being interchangeable). In the screen shot below, the Virtual Wiring timer is represented by a Device with a single output (for turning other Virtual Wiring Devices on and off). 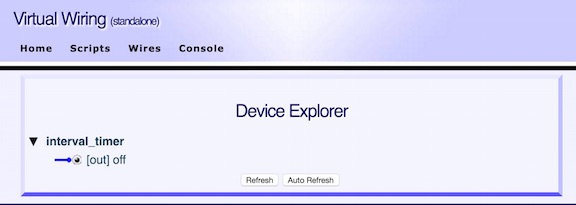
For a complete description of all the Devices we support and their parameters, see our Devices page. |
Catalina Computing, LLC.Copyright © Catalina Computing, LLC. (2013-2018) 
|
Page last updated: Wed Feb 15 21:53:17 2017 (UTC) |