|
|
Recipes << ArduinoPanTiltRecipe | Software Overview | Sitemap | Downloads | Developers | Forums |
|
|
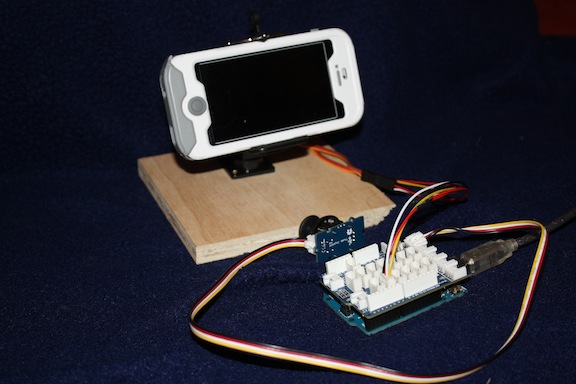
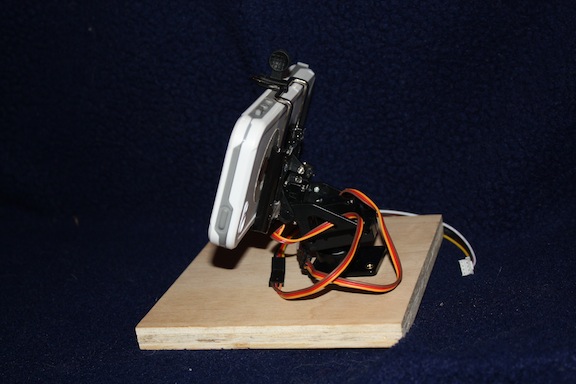
Recipe for Panning and Tilting Using a Joystick or the WebThis Recipe controls a general purpose pan/tilt platform. A camera, webcam, or cell phone could be put on the platform and controlled remotely. IngredientsFor this recipe, you will need:
There are many pan/tilt brackets available on the market. Some are quite inexpensive (well under $10), while others are $50 or more. If you wish to pan and tilt something which is lightweight (a webcam, for example), the cheaper brackets are probably fine. Heavier devices, such as compact cameras and cell phones, may require bigger, more expensive brackets. The same is true for servos. The smaller and cheaper servos will work fine for lightweight panning and tilting, and more powerful servos are needed for heavier objects. If you use more powerful servos, they may need more power than the Arduino platform can provide and require a separate (usually 5V-6V) power supply. 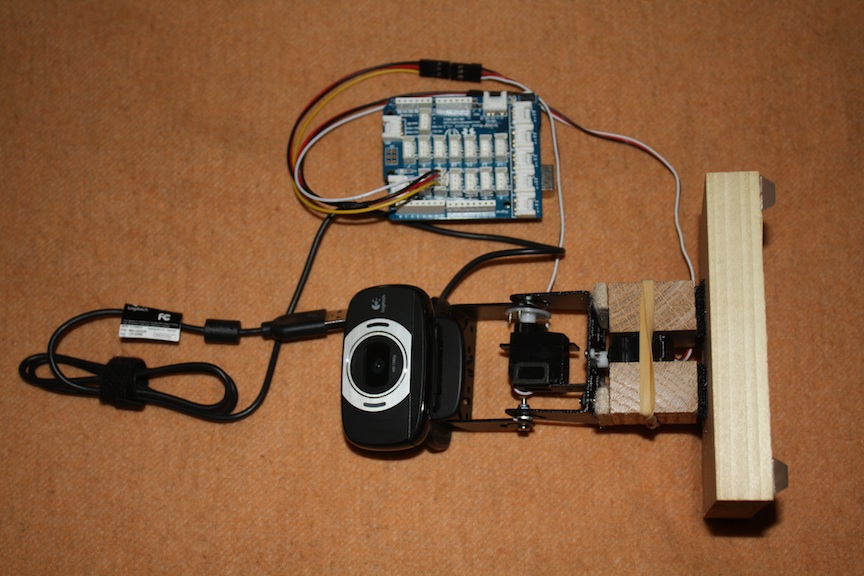
ScriptYou can find the Script in the Scripts "examples" area. The Script is called "pan_tilt_with_joystick.script". The Script allows web and joystick control of a pan tilt platform. Connect the Thumb Joystick left-right output to Arduino pin A1, and the up-down output to Arduino pin A0 (for our setup, both connections are made through the same Grove connector). Connect the 2 servo power wires to the 5V and GND of the Arduino. (If you are using high power servos, you may need a separate 5V supply.) Connect the panning servo control input to Arduino pin 3, and the tilting servo control input to Arduino pin 2. To run this Script, you need 3 parameters: the "arduino_port", "joystick_pins", and "servo_pins" parameters. The arduino_port parameter is the name of the USB port of the Arduino. On *nix hosts, the USB port name is in the "/dev" directory. To see the devices in order of their creation, type "ls -lrt /dev" at a shell prompt and look near the bottom of the list for your Arduino's USB port. The joystick_pins parameter defines the analog input pins on the Arduino that connect to the 2 joystick wires. The servo_pins parameter defines the output pins on the Arduino that connect to the 2 servos. Both parameters take a quoted string with 2 comma separated pins inside. As an example, for an Arduino at USB port "/dev/ttyUSB0" with a Grove Thumb Joystick connected to analog pins "A0" and "A1" and with 2 servos connected to pins 2 and 3, the Script parameters are:
Running the ScriptRun the Script and use the joystick to control the platform. Control the platform from the web by using the Device Explorer page. Go to the page and click on the "arduino" device and try changing the "x_servo" and "y_servo" terminal values. Depending on how your joystick is calibrated, you may need to adjust the 2 Mapper Devices' mapping parameters. You can do this by changing the "from" parameter values in these 2 lines (currently set for a joystick which goes from 20% to 80% of max): |
Catalina Computing, LLC.Copyright © Catalina Computing, LLC. (2013-2018) 
|
Page last updated: Thu Apr 3 02:20:48 2014 (UTC) |